

This post may contain affiliate links, please read my disclosure policy for details.
This Better-Than-Takeout Orange Chicken is crispy, tender and coated in the most delicious sticky orange sauce. It’s packed with sweet and savory flavor!
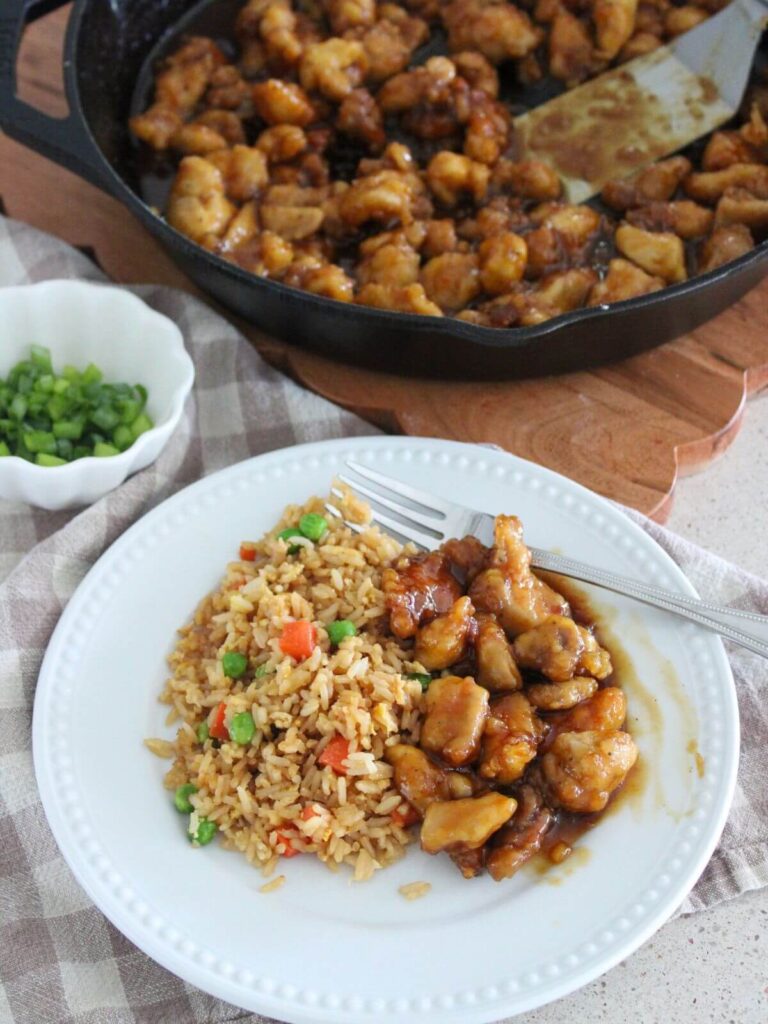
This is one of those recipes that I tried and tried again. It was too orange juicey, not crispy enough, not orangey enough, and so on. It was a recipe that I just could not get right. Finally, I got it and it has become a family favorite. The flavor is so good. The perfect mix of all the flavors in a just right consistency. We love to eat it with some friend rice. The best part is it is quick to make and half the price of grabbing out. You’ll want to try this recipe out!
Why You’ll Love This Orange Chicken
Ingredients You’ll Need

How to Make Better-Than-Takeout Orange Chicken
Please see the recipe card at the bottom of this post for the full recipe details


- Prepare the chicken. Cut the chicken thighs into 1-inch pieces and place them in a large bowl. Add the egg, tamari (or soy sauce), garlic powder, salt and black pepper, then stir until the chicken is evenly coated. Let it rest for 15–20 minutes.
- Make the orange sauce. In a separate bowl or mason jar, whisk or shake together the orange juice, water, tamari (or soy sauce), brown sugar, honey, rice vinegar, garlic, ground ginger, sesame oil and cornstarch. Set the sauce aside.
- Coat the chicken. Add the cornstarch to the marinated chicken and toss until every piece is well coated. The coating may look a little uneven and craggy, which helps the chicken become extra crispy.
- Heat the oil. Pour approximately ¼ inch of avocado oil into a large skillet and heat it over medium-high heat. The oil is ready when a small pinch of cornstarch sizzles immediately after being added.
- Cook the chicken. Working in batches, add the chicken in a single layer without overcrowding the skillet. Cook for 3–4 minutes per side, or until golden, crispy and cooked to an internal temperature of 165°F.
- Drain the chicken. Transfer the cooked chicken to a paper towel lined plate. This allows the excess oil to drain.
- Thicken the sauce. Carefully remove the frying oil and wipe out the skillet. Whisk or shake the sauce one more time to mix. Pour in the orange sauce and bring it to a gentle simmer over medium heat. Whisk frequently for 2–3 minutes, or until the sauce is thick and glossy.
- Coat and serve. Add the crispy chicken to the skillet and gently toss until every piece is coated in the orange sauce. Serve immediately over warm rice and your veggie of choice.
Recipe Tips
Use chicken thighs: They stay tender and juicy and are much harder to overcook than chicken breasts.
Cut the chicken evenly: Similar-sized pieces will cook at the same rate.
Make sure the oil is hot: If the oil isn’t hot enough, the coating will absorb oil instead of becoming light and crispy.
Cook in batches: Overcrowding the skillet lowers the oil temperature and prevents the chicken from crisping properly.
Drain on a paper towel lined plate: This lets the chicken drain any excess oil.
Whisk or shake the sauce again before cooking: Cornstarch can settle at the bottom of the container as it sits.
Toss just before serving: Add the chicken to the sauce at the very end to preserve as much of that crispy coating as possible.
How to Store and Reheat
To Store: Let the Orange Chicken cool completely and then store in a container in the refrigerator for up to 3-4 days.
To Reheat: Warm the Orange Chicken in a pan over medium low-heat till warm. You can add a splash of broth to keep the sauce delicious. For faster warming you may heat in the microwave with a splash of broth in 30-second intervals until warm.
How to Serve
We love to eat this Orange Chicken with a side of fried rice. Add your favorite veggies to make it a complete meal. Broccoli or green beans would be a good choice.

Frequently Asked Questions
More Chicken Dinner Recipes You’ll Love

Better-Than-Takeout Orange Chicken
Ingredients
For the Chicken
- 1½ pounds boneless skinless chicken thighs, cut into 1-inch pieces
- 1 large egg
- 1 tablespoon tamari or soy sauce
- ½ teaspoon garlic powder
- ½ teaspoon salt
- ¼ teaspoon black pepper
- ¾ cup cornstarch
- Avocado oil for shallow frying
For the Orange Sauce
- ⅓ cup orange juice
- ⅓ cup water
- ¼ cup tamari or soy sauce
- ¼ cup packed brown sugar
- 2 tablespoons honey
- 2 tablespoons rice vinegar
- 3 cloves garlic finely minced
- ½ teaspoon ground ginger
- 1 teaspoon toasted sesame oil
- 1 tablespoon cornstarch
Instructions
- Place the chicken in a large bowl. Add the egg, tamari (or soy sauce), garlic powder, salt and black pepper. Stir until evenly coated, then let the chicken rest for 15–20 minutes.
- In a separate bowl or mason jar, whisk or shake together the orange juice, water, tamari (or soy sauce), brown sugar, honey, rice vinegar, garlic, ginger, sesame oil and cornstarch. Set aside.
- Add ¾ cup cornstarch to the marinated chicken. Toss until every piece is generously coated.
- Pour approximately ¼ inch of avocado oil into a large skillet and heat over medium-high heat.
- Working in batches, arrange the chicken in a single layer in the hot oil. Cook for 3–4 minutes per side, or until golden, crispy and cooked to an internal temperature of 165°F.
- Transfer the cooked chicken to paper towel lined plate. Continue cooking until all the chicken is finished.
- Carefully remove the frying oil and wipe out the skillet. Whisk or shake the prepared sauce once more, then pour it into the skillet.
- Bring the sauce to a gentle simmer over medium heat. Cook for 2–3 minutes, whisking frequently, until thick and glossy.
- Add the crispy chicken to the sauce and toss just until evenly coated. Serve immediately over warm rice.
Notes
- Chicken thighs give this recipe the juiciest, most tender results. Chicken breasts may be substituted, but take care not to overcook them.
- Cook the chicken in batches so the oil stays hot and the coating becomes crispy.
- Whisk or shake the sauce again before adding it to the skillet because the cornstarch may settle.
- For the crispiest chicken, add it to the sauce immediately before serving.
Did you make this recipe?
I’d love to see! Tag @simplychelseahome on Instagram and leave a comment below!!


